Fixing "Retina" Image Scaling with Gyazo
You know the new Apple Retina MacBook Pro laptop? The one with the super-high resolution display? Well, I got one last week, and I spent all weekend updating my dotfiles to work with OS X 10.8 (Mountain Lion). And after a lot of wrangling with XCode, I finally managed to get everything working. Well, almost everything.
While using Gyazo, I’ve encountered one particularly annoying “Retina” related issue. I posted an article a few years ago about running Gyazo on your own server, and ever since then I’ve been running Gyazo without a problem. The first time I used it on the new laptop, however, I noticed that something odd was happening: every Gyazo screengrab on the new Retina screen was about twice as big as I expected.
Note that while this article addresses an issue within the context of using Gyazo, because it’s more of a general OS X issue, the solution presented herein can be useful in similar scenarios.
The Red (Yellow?) Flag
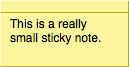
For visual comparison, this is what I was expecting to see, taking a screenshot of a very small (129x67 pixel) sticky note on the Retina display.
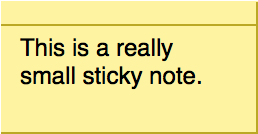
And this is the image I actually saw. Sticky? Yes. Small? No.
So I did a little snooping and came to the conclusion that the problem is not with Gyazo, but instead with the underlying OS X screencapture utility, which Gyazo uses internally to take its screengrabs.
The Snooping
I blindly ran some commands in the terminal, and noticed something interesting.
# Take a screen grab on a regular ol' non-Retina external display.
screencapture -io normal.png

# Log DPI and pixel information
sips normal.png -g dpiWidth -g dpiHeight -g pixelWidth -g pixelHeight

# sips output for a normally scaled image; the DPI is 72.
/Users/cowboy/normal.png
  dpiWidth: 72.000
  dpiHeight: 72.000
  pixelWidth: 129
  pixelHeight: 67

# Take a screen grab on the super high resolution scaled Retina display.
screencapture -io retina.png

# Log DPI and pixel information
sips retina.png -g dpiWidth -g dpiHeight -g pixelWidth -g pixelHeight

# sips output for a Retina-scaled image; the DPI is much higher.
/Users/cowboy/retina.png
  dpiWidth: 143.990
  dpiHeight: 143.990
  pixelWidth: 258
  pixelHeight: 134
The screengrab taken on the “normal” unscaled display has the correct pixel dimensions along with a DPI (Dots per inch) of 72, which has been the standard DPI on Macs for a very long time. The screengrab taken on the Retina display, however, is much larger, with a proportionately higher DPI. This makes sense, due to the way OS X handles scaling on the Retina display.
So, even though the image appears “normal” size on a Retina screen, it’s actually being rendered at the higher DPI / larger size and scaled down. When the OS X screencapture utility is used to take a screen grab, it captures the image at the higher DPI and resolution. And when that image is uploaded to be viewed on the web, it is WAY TOO BIG.
The Solution
This one’s easy. Since web browsers don’t automatically scale images based on their DPI, and since Gyazo doesn’t scale them for you either, I wrote some code to do it.
This simple “resample-dpi” bash script, available separately or as part of my dotfiles, takes any number of images and resamples them the expected pixel dimensions and 72 DPI. Pass as many images to it as you’d like, it will only resample the images that aren’t already at 72 DPI.
# Resample the aforementioned normal.png and retina.png images.
resample-dpi retina.png normal.png

# resample-dpi output.
Resampling retina.png to 129x67 pixels @ 72 DPI.
File normal.png already 129x67 pixels @ 72 DPI.
So, the script alone works on the command line. Great. How do we get it to work with Gyazo? Well, I first opened the main Gyazo script at /Applications/gyazo.app/Contents/Resources/script in my editor. Then I found the line where the screen grabbing was happening. It looked something like this:
  system "screencapture -io \"#{tmpfile}\""
  if File.exist?(tmpfile) then
    system "sips -d profile --deleteColorManagementProperties \"#{tmpfile}\""
  end
I then modified Gyazo’s script to run the resample-dpi script after the screencapture part, by inserting one line of code afterwards.
  system "screencapture -io \"#{tmpfile}\""
  if File.exist?(tmpfile) then
    system "~/.dotfiles/bin/resample-dpi \"#{tmpfile}\""
    system "sips -d profile --deleteColorManagementProperties \"#{tmpfile}\""
  end
A few important notes:
- You’ll probably need to change the
~/.dotfiles/bin/resample-dpipath to pont to the location where you saved the resample-dpi script. - The resample-dpi script needs to be executable, which you can do in the terminal with
chmod +x resample-dpi.
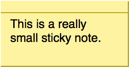
Once done, your Gyazo Retina screengrabs should be the size you expect. Note that because the image is being resampled, there may be some antialiasing artifacts. For example, this is the unscaled screengrab from a regular ol’ non-Retina external display.
And this is a Retina image, resampled by the resample-dpi script. Note that it’s at the expected size, but is less crisp due to the antialiasing.
Whatever. I can handle the antialiasing, just as long as I don’t have to deal with obscenely high resolution Retina images.
- Categories:
a,b,i,br,p,strong,em,pre,code.<pre class="brush:js"></pre>(supported syntax highlighting brushes:
js,css,php,plain,bash,ruby,html,xml)<instead of<and>instead of>in the examples themselves.